Switching Settings in Ableton Live
live sets tend to change a lot from song to song. even in a traditional rock band, the guitarist will change effects pedal settings or swap an electric guitar for an acoustic, the drummer may change sticks, & the keyboardist will likely change presets. what if all this song setup & setting switching could be done with the press of a single button? ableton live allows you to do just that with very little set up, regardless of the size of your set or the instruments you use.
Dummy Clips
dummy clips are one of the best underused tools for managing a live set. the concept is pretty simple - a blank clip used to control settings rather than trigger sound. I have found the most intuitive way to switch between instruments & effects on stage is by using a combination of dummy clips & racking techniques.
this couldn't be easier to use but does require some set up. I'll demonstrate how this works with a midi instrument:
create a rack & add each instrument you will use on that track in your live set to parallel chains
open the chain select editor & move each chain's blue "zone" tab to a unique value - this is best done sequentially (the first chain on "0", the second on "1", etc.)
finally, map the chain selector to a macro knob
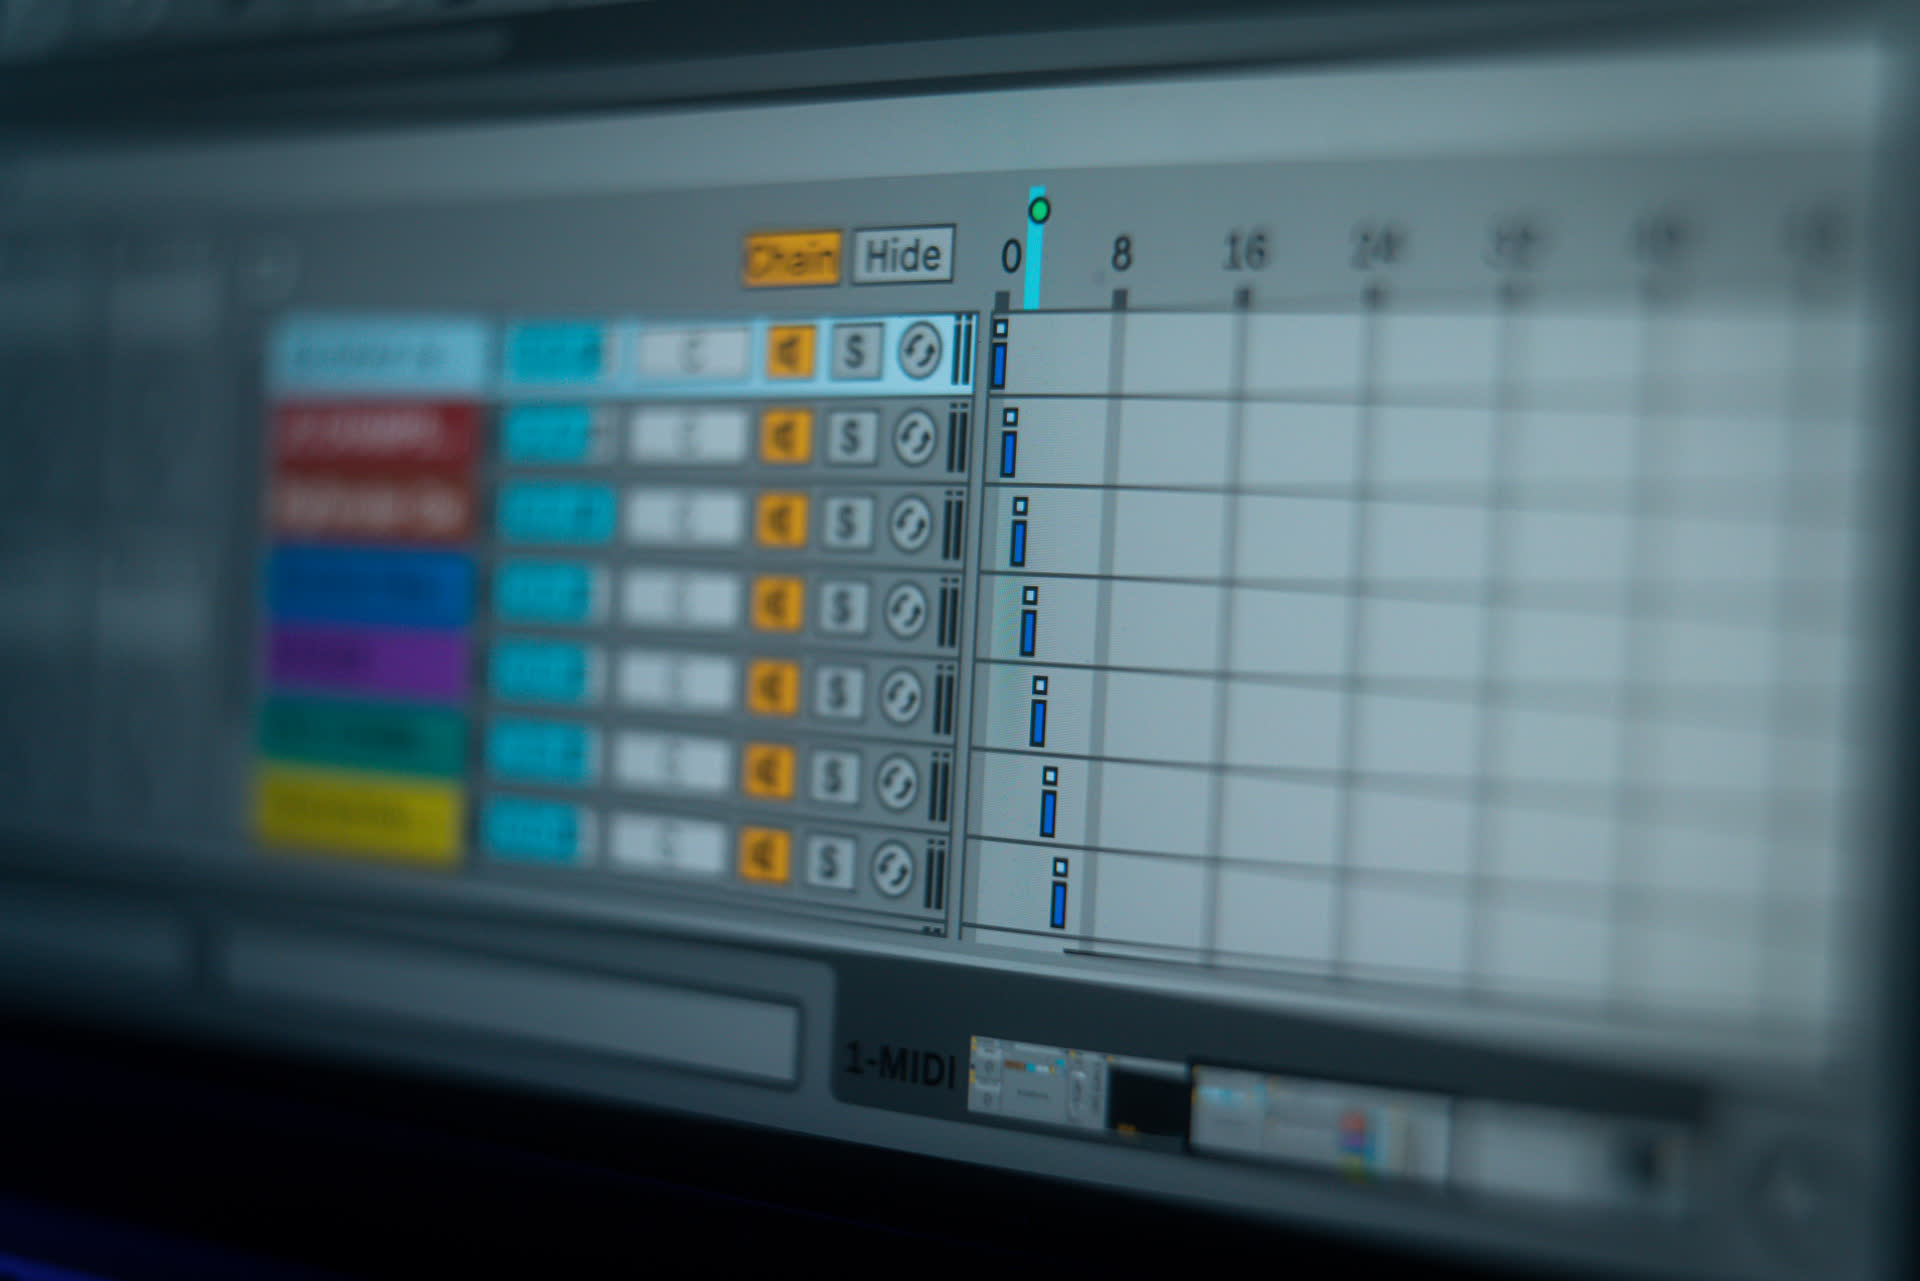
now that we can switch instruments with a single knob, it's time to create dummy clips that will allow us to make selections via clip launch:
create a new midi clip
deactivate the loop, make its length as short as possible, & change launch quantization to "none"
now open up the envelope box & edit the chain selection macro knob's envelope - set it's value to "0"
duplicate the clip & change the envelope value to "1"
continue to create clips with envelope values of "2", "3", & so on until every chain has an associated clip
now, by launching these clips, a different chain in your instrument rack can be selected immediately. there are lots of advantages for using this method instead of selecting from a knob: it is top-level - there's no need to dig through selection & device details to make a change. it is exact - you know which chain a dummy clip will launch without having to wrestle a knob to a particular value. it is modular - you can launch multiple clips at a time to change multiple chains across multiple tracks at once.the same trick will work for audio effect racks as well; just use a silent unlooped audio clip instead of a blank midi track. this is fantastic for changing vocal processors or guitar effects as needed per song. for sets that will process external instruments with effects & plugins, you'll definitely want to be able to load presets quickly.
Macro On/Off
if you're working with a very large set, using the dummy clip method of instrument/effect selection becomes even more essential to manage the overwhelming array of devices. of course, you won't want a lot of unused plugins active at one time either for the sake of cpu. fortunately it's really easy to work around this.
map each on/off button to the chain selection macro knob (this goes a lot faster if you've enabled "map to all siblings")
click the "map" button in the instrument rack
change each chain's min/max to its selection value (i.e. 0 & 0 for 0, 1 & 1 for 1, & so on)
& it's that simple. instruments & racks will only be turned on when their chain is actively selected.
Hardware Presets & Dummy Clips
if you're using an external electronic instrument in your live set, there's a good chance it can be controlled via program change messages over midi. every piece of hardware will work differently so you'll need to refer to the manual for exactly how these values manipulate its settings. as far as the ableton side of things goes, however, this will work exactly like the dummy clips - create a short, unlooped clips with different program changes & set up the "midi to" section to send the information out through a midi port, if necessary.
certain vst's (like native instruments' guitar rig & arturia's excellent V collection) can use program changes to switch presets. it's worth having a look at the plugins you use the most & seeing if this is an option for them.
Swapping Racks
many songs will use two or more different instruments that vary by section. maybe the verse requires a light, plucky sound & the chorus uses a dense, multi-layered synth. once again, the chain selector provides a simple method for switching between these. You'll probably want to place the blue "zone" of the A instrument on 0 & the B "zone" on 127 as most midi hardware buttons default to 0 (off) & 127 (on).
I recommend mapping the chain selection to a top-level macro, especially if you're using multiple selectable racks as above. this way, you can midi map the single macro knob instead of each individual chain selector. no matter which song's chain is active, you can reliably use the same button to switch between your A & B instruments.
BPM & Time Sgnature
scenes are great for a lot of reasons, but one the best is they can easily & exactly change live's tempo. just rename a scene to "number BPM", with "number" being replaced by a tempo value. you can even change time signature! check out the how launching these properly named scenes affects tempo:
I usually start my songs by launching a single scene containing all the dummy clips. I can switch presets for multiple instruments, effects, & tempo with the press of a button. in this way I can set up "global" presets for every song I plan to perform. I recommend incorporating some iteration of these methods into your live set for better device management.
Conclusion
thanks for reading! check out my previous article essential tools & tricks for playing live with ableton live to learn more tricks for live performance.
Conclusion
thanks for reading! check out my previous article essential tools & tricks for playing live with ableton live to learn more tricks for live performance.
Conclusion
thanks for reading! check out my previous article essential tools & tricks for playing live with ableton live to learn more tricks for live performance.


pATCHES © 2024
pATCHES © 2024
