Collecting Clips As Samples in Ableton Live
Creating new sounds is an important step in most production processes. Whether you're specifically creating samples for later use or just want to save what you've made organically in a track, you should know the best & fastest ways to store them in a library that you can draw from in the future. These are the methods I like to use to save my own samples in Ableton Live.
Dragging Into the Browser
Live's browser is a window into your computer's file architecture & naturally is the most straightforward way to save samples as you create them as you can drag clips directly into the folders you keep here. Now, this is pretty simple/obvious, but there are a few things you should keep in mind.
When you drag a clip into the browser a new project folder is created. In the root of that folder you'll find a file with the sound's name but the format is .alc - an Ableton proprietary format for clips - which references the audio in the newly created project but does not contain any audio itself. If you move your samples around for organization it's easy for this system to break down as the two files can easily get separated, lost, or accidentally deleted. I think it's better to just keep the audio on its own - you can find it in the "samples" folder under its appropriate category. From here, you can move the .wav file to your sample library.
It's slow to create a new folder & drag out the audio this way every time you want to save a new sample, so what I tend to do is drag clips into the temporary sample project folder & build the samples in there throughout my session. I'll wait until everything has been assembled in these folders & then move them all out at once.
a note about .alc
If you don't plan to take the audio out of live, you'll probably be fine using the .alc files. In this case, I recommend creating a folder in the user library & dragging it into the places section of the sidebar. When you drag clips into this folder a project won't be created. Instead, all of the .wav samples will collect in the user library's global sample folder, keeping your .alc clips folder clean.
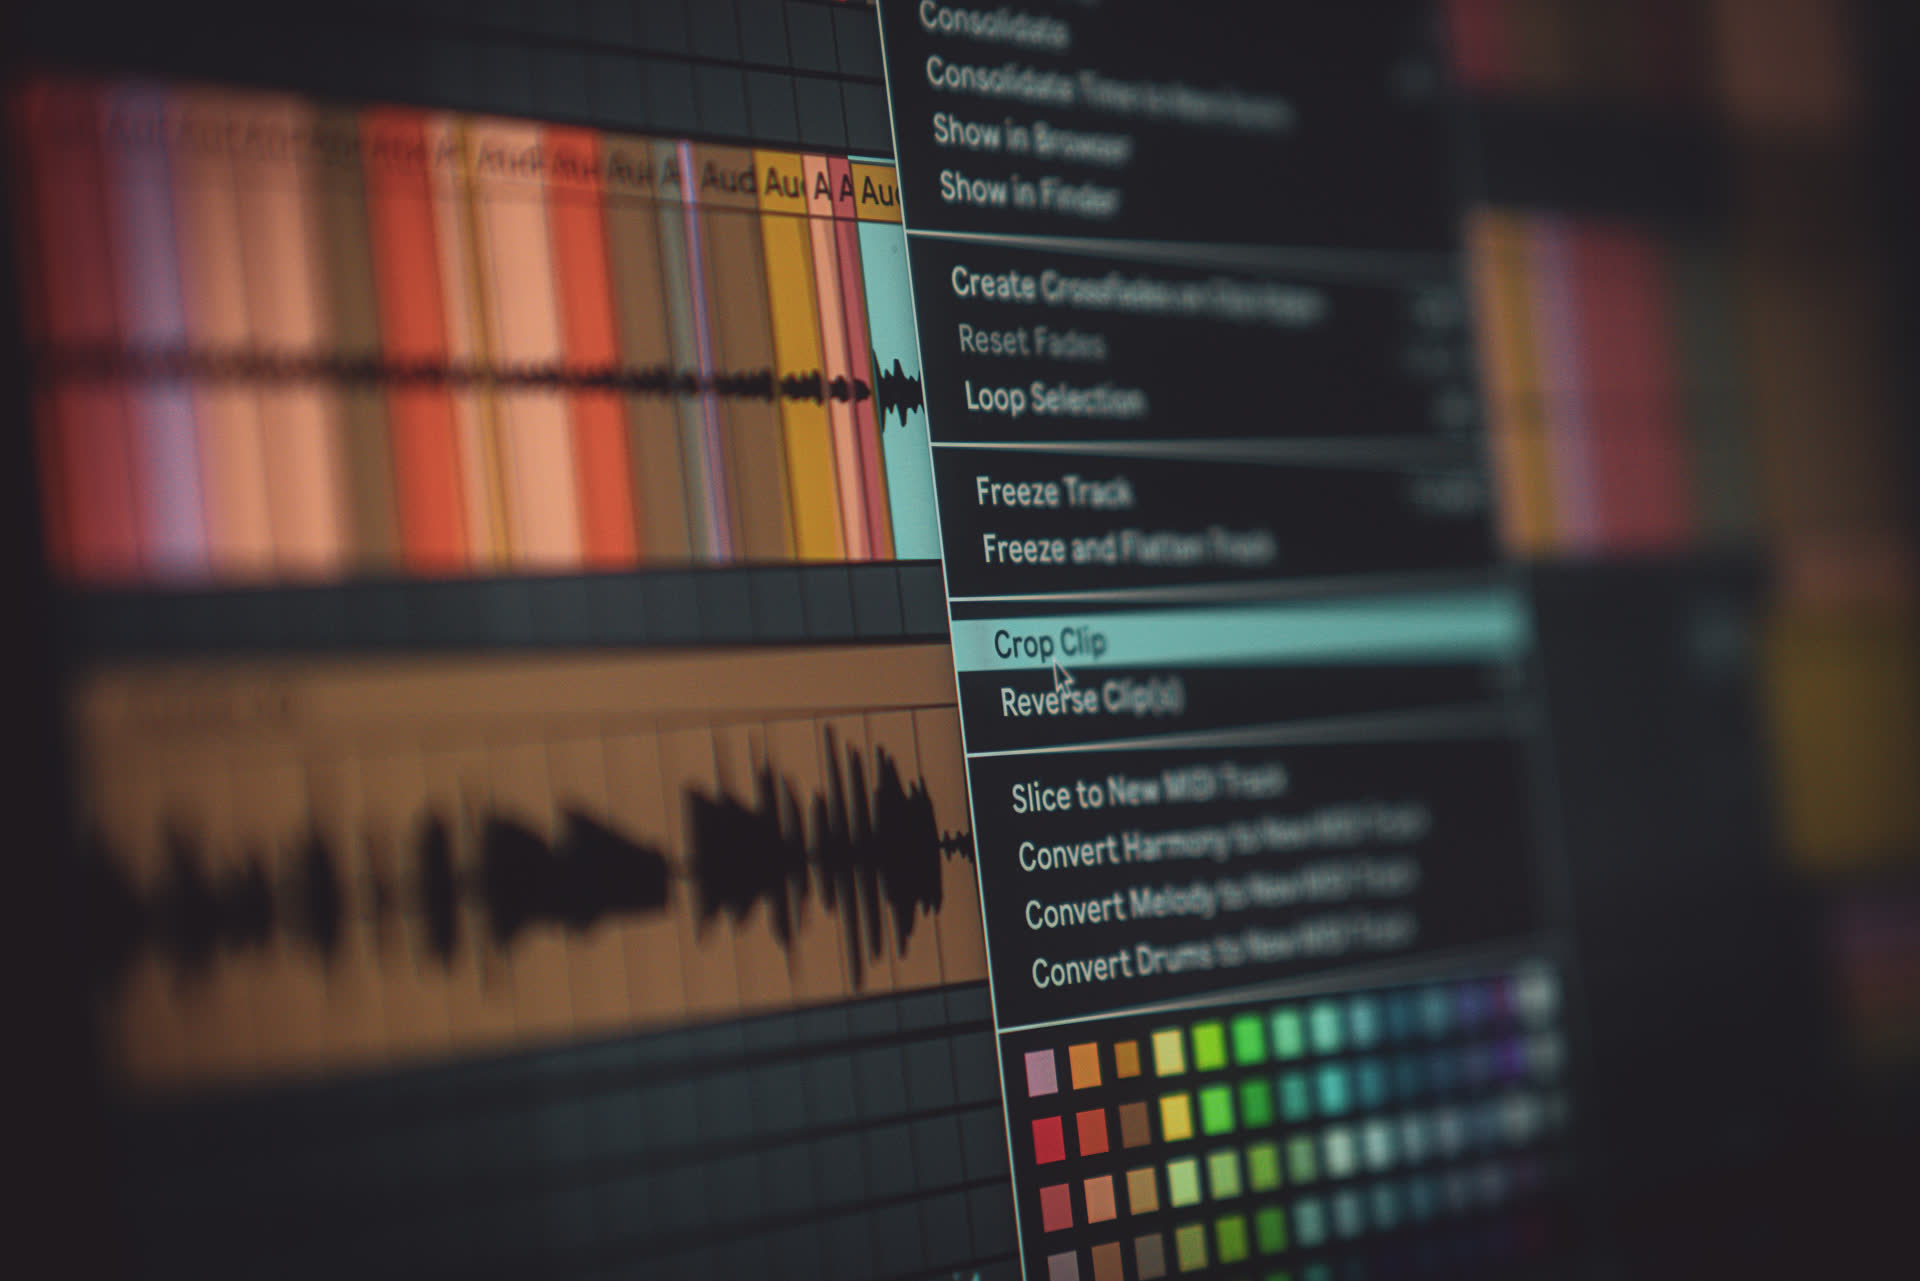
Crop & Collect
If you try dragging multiple clips into the browser all at once you'll find that they will be rejected & none of the files will save. The workaround for this is to instead pull the whole track that contains the clips into the folder.
Crop & Collect
If you try dragging multiple clips into the browser all at once you'll find that they will be rejected & none of the files will save. The workaround for this is to instead pull the whole track that contains the clips into the folder.
Crop & Collect
If you try dragging multiple clips into the browser all at once you'll find that they will be rejected & none of the files will save. The workaround for this is to instead pull the whole track that contains the clips into the folder.
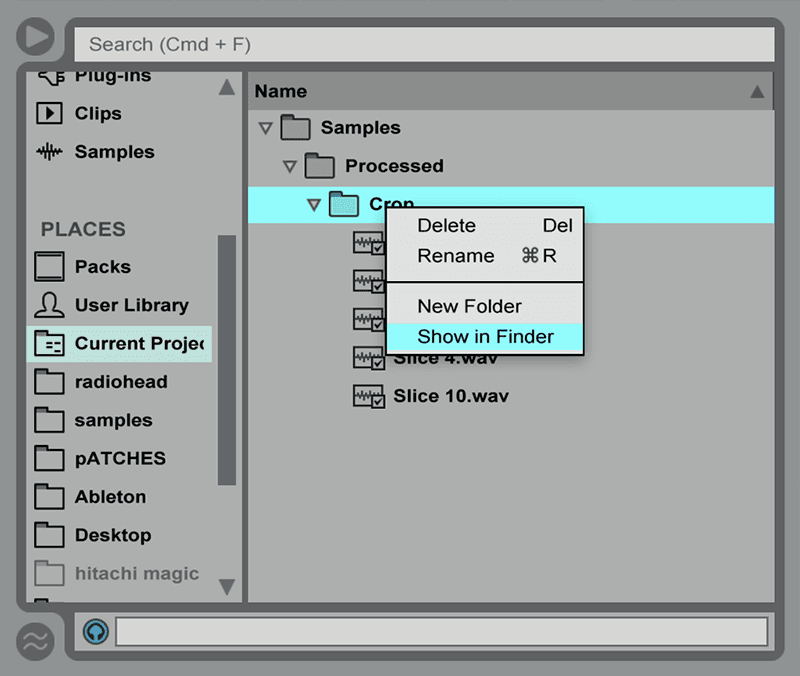
After you work through each slice, it works a lot like the "crop & collect" method - drag the drum rack into the browser to create a project, dig through the folders & find all your samples collected & organized. Then you can move this folder wherever you want & rename it to something more useful than "crop". This is probably the slowest method here, but I like it because of all the "accidental" sounds you can find because of the automatic transient slicing & normalization. Small blips of sounds that you could easily look over become unusual, wonderful percussion for your tracks.
After you work through each slice, it works a lot like the "crop & collect" method - drag the drum rack into the browser to create a project, dig through the folders & find all your samples collected & organized. Then you can move this folder wherever you want & rename it to something more useful than "crop". This is probably the slowest method here, but I like it because of all the "accidental" sounds you can find because of the automatic transient slicing & normalization. Small blips of sounds that you could easily look over become unusual, wonderful percussion for your tracks.
After you work through each slice, it works a lot like the "crop & collect" method - drag the drum rack into the browser to create a project, dig through the folders & find all your samples collected & organized. Then you can move this folder wherever you want & rename it to something more useful than "crop". This is probably the slowest method here, but I like it because of all the "accidental" sounds you can find because of the automatic transient slicing & normalization. Small blips of sounds that you could easily look over become unusual, wonderful percussion for your tracks.
On the other hand, if you want to make granular adjustments to a dial, just hold down the cmd key to make fine tuned adjustments.
On the other hand, if you want to make granular adjustments to a dial, just hold down the cmd key to make fine tuned adjustments.
On the other hand, if you want to make granular adjustments to a dial, just hold down the cmd key to make fine tuned adjustments.


pATCHES © 2024
pATCHES © 2024
