Key Mapping in Ableton Live
The keyboard shortcuts in Ableton Live are as robust as they are useful, but there are a number of features that fall outside the scope of the application's default shortcuts. These are often rather specific to an individual's needs & generally speaking using a midi controller is a great way to speed up those areas of your workflow. If you're a laptop-based producer working in multiple locations, however, you won't always have one on you. In these cases, one may turn to Live's highly versatile key mapping features.
you've probably tried to work with other producers before and been sent only the .als for the project. this is ableton's proprietary "live set" file that contains information on the layout (such as midi and clip arrangement) but does not include some essential items for the project - namely, the audio files. after all, look how small the .als is - there isn't any lossless audio contained in that file! this is why it's important to share the entire project folder, as it's critical your collaborator have the /samples folder as well.
you've probably tried to work with other producers before and been sent only the .als for the project. this is ableton's proprietary "live set" file that contains information on the layout (such as midi and clip arrangement) but does not include some essential items for the project - namely, the audio files. after all, look how small the .als is - there isn't any lossless audio contained in that file! this is why it's important to share the entire project folder, as it's critical your collaborator have the /samples folder as well.
you've probably tried to work with other producers before and been sent only the .als for the project. this is ableton's proprietary "live set" file that contains information on the layout (such as midi and clip arrangement) but does not include some essential items for the project - namely, the audio files. after all, look how small the .als is - there isn't any lossless audio contained in that file! this is why it's important to share the entire project folder, as it's critical your collaborator have the /samples folder as well.
Keyboard Overlap
Live already makes substantial use of your computer's keyboard, even outside the innumerable modifier-based shortcuts. I've made this infographic to help you avoid the keys that are feature-laden or unmappable:
keyboard (blue) of course represents the built-in single octave keyboard, a wonderful asset for demoing sounds or quick composition on the go. You can override these if you wish when your needs require it, but I prefer to leave it alone.
system (red) represents unmappable keys that are used as modifiers & computer-related input.
ableton (yellow) are the keys that already have function in live without modifiers, including z & x (keyboard octave change), c & v (keyboard velocity change), & tab (switch between arrangement & session views).
Keep in mind that Live distinguishes between capitals, so if you want to map some of these default shortcuts without overriding their functions, you can. For example, b enters draw mode, but you could map B to turn the metronome on & still preserve the lowercase b for draw mode.
Save to Template
There are many, many functions you can key map - device parameters, mutes, track selection, etc. These can be handy in a pinch on a per-track basis, but my focus today will be on ideas for key maps that are useful in all projects that effectively expand Live's functionality & keyboard shortcuts. As such, you may consider saving your favorites into your default template - this way, every time you load up a new project you have all the keyboard shortcuts you find useful without having to map them each time.
You can check out my guide to reference tracks for an example of a useful default template you can build with key maps. Below, you will find 5 ideas to get you started.
Locator Create/Delete/Select
If you're like me, you use a lot of locators to keep your project marked & organized. The ability to jump around to the most important sections of your tracks is fantastic & key mapping can make this process even faster. I prefer < & > as my selectors because they look like their function, & ? for set/delete because of its proximity to those keys.
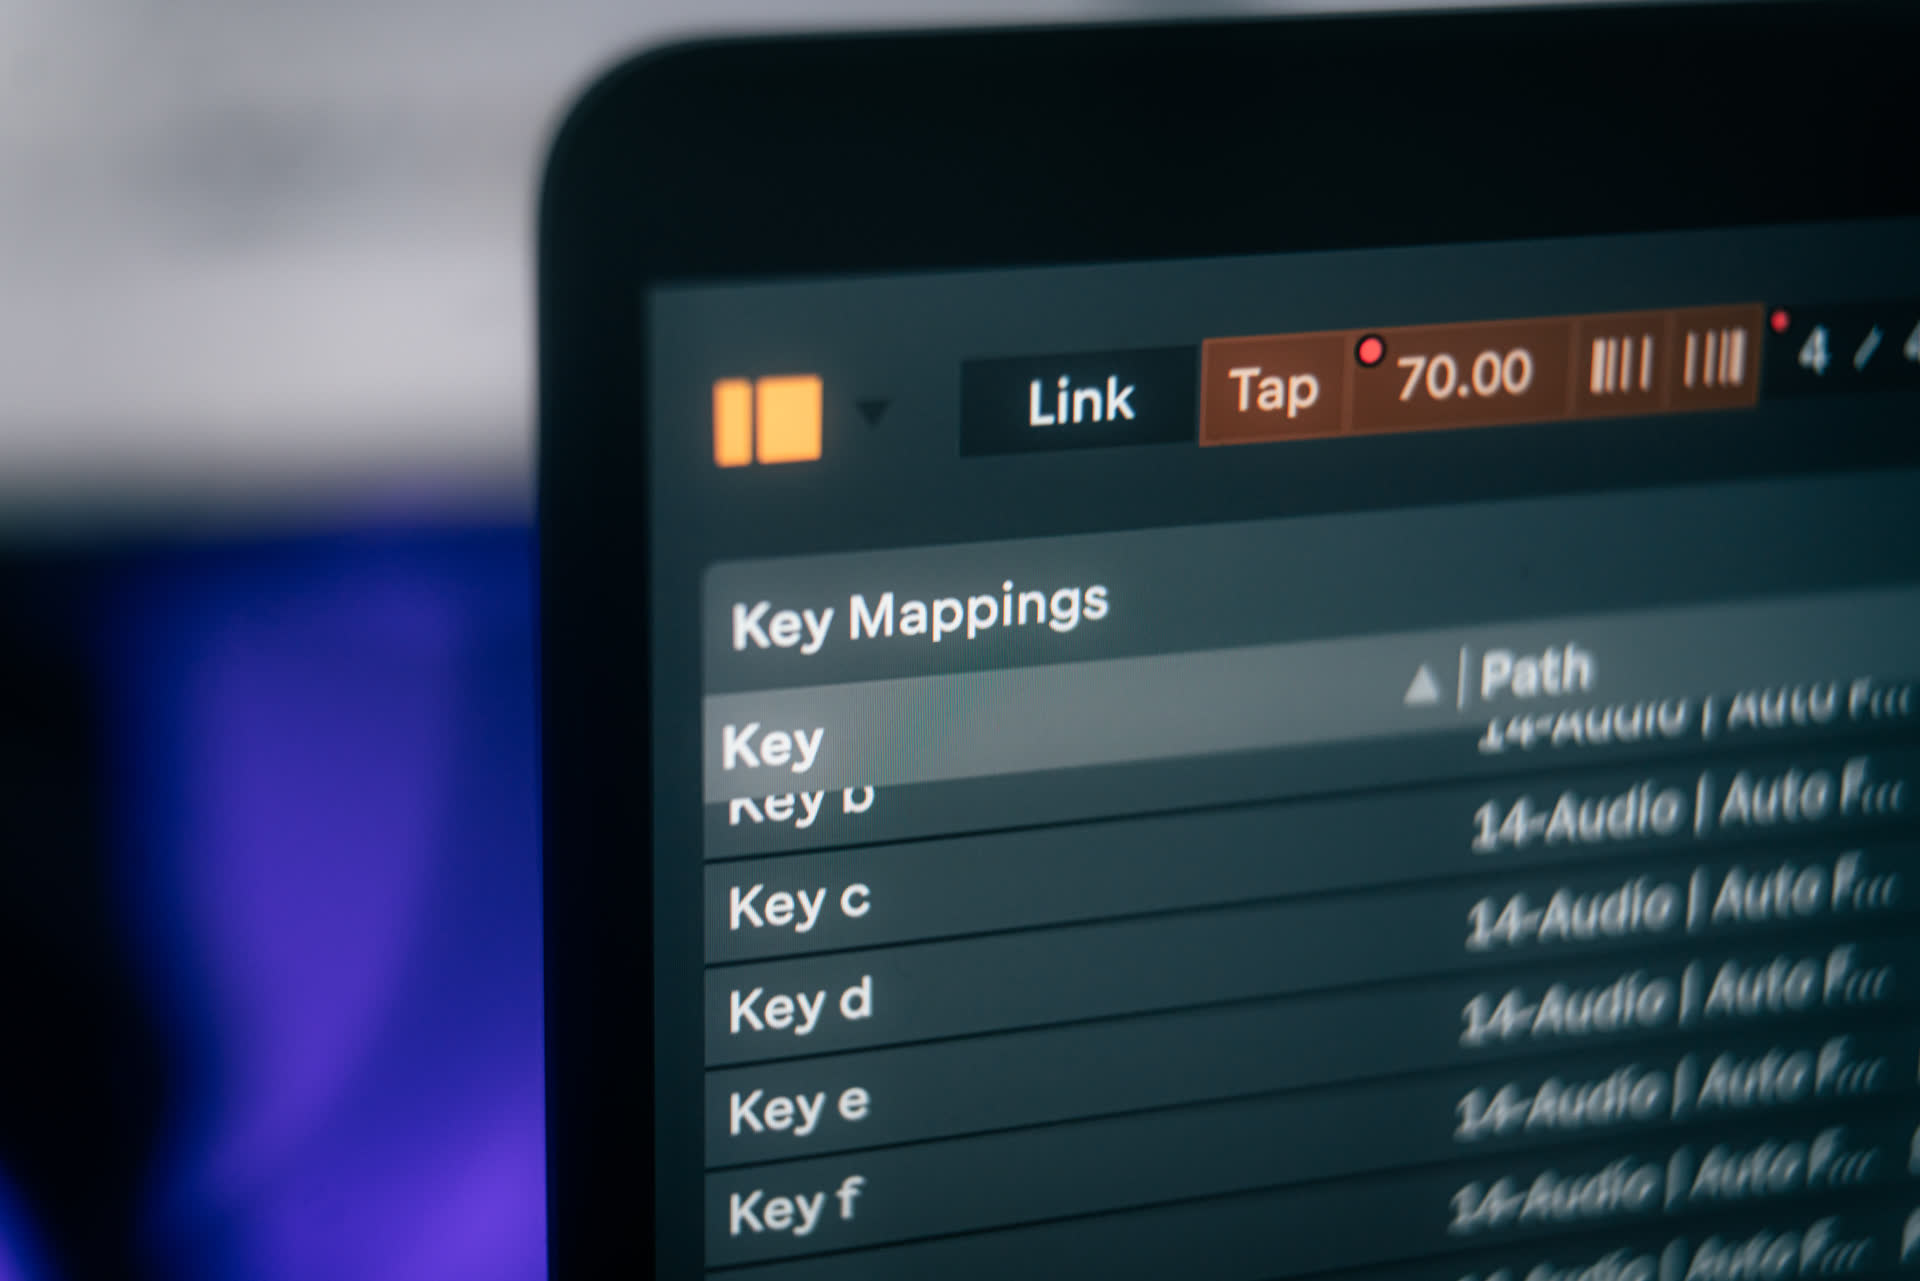
Tap Tempo
Tap tempo is in many ways the most organic way to enter tempo. Clicking on a mouse will do fine, but pressing a button feels a lot more solid & natural. It can be handy to have this feature ready & waiting when you load up a project so it's one I definitely recommend saving this to the default template.
Metronome On/Off
If you're doing any kind of live recording & want to sync to the grid, the metronome is indispensable. it has always bothered me there is no default keyboard shortcut for turning the click track on and off but fortunately key mapping makes this possible. Once again, adding this to your default template can pay dividends in convenience going forward.
Automation Arm
If you're modulating a lot of parameters, automation arm is a feature you'll be turning on an off as required throughout your project. It's a minor improvement to not have to move & click the mouse to do this, but over the course of many projects & automation arming it in this way can be a huge time-saver.
Record
Creating key maps for existing keyboard shortcuts can feel redundant, but for certain shortcuts & uses it makes sense. If you're on a mac, Live's default record shortcut requires you to use two hands to reach the fn & f9 keys at the same time. There are plenty of situations where you'll want at least one hand on your instrument in preparation for playing & the more simple single key press proves useful. I use r as it's not taken up by any other function by default.
Master Volume Snap
You'll often want to check your mix at low levels to hear what pokes through. Of course, you can turn down knobs on your interface or mixer, but mapping the master volume fader to snap to a specific lower level will be quicker & more consistent every time.
Master Volume Snap
You'll often want to check your mix at low levels to hear what pokes through. Of course, you can turn down knobs on your interface or mixer, but mapping the master volume fader to snap to a specific lower level will be quicker & more consistent every time.
Master Volume Snap
You'll often want to check your mix at low levels to hear what pokes through. Of course, you can turn down knobs on your interface or mixer, but mapping the master volume fader to snap to a specific lower level will be quicker & more consistent every time.
Check Mono Compatibility
Here's an excellent bonus tip thanks to reddit user u/ProfessorStrangeman:
Ooo! I have one to add!! I've got a Utility on my master bus with the width set to 0% & the on/off mapped to the tilde '~' key so I can quickly mono reference while sound designing & mixing.
This is definitely one that's worth adding to your default template - it's easy to do but you don't want to have to set it up every time you load a new project. It is always a good idea to check for mono compatibility and having a quick switch at your fingertips can really speed this process up.


pATCHES © 2024
pATCHES © 2024
