Inverted Fades for Gain Swells
Whether it’s to maximize space for a kick drum or to create a pumping that compels listeners to move, sidechaining is a common technique that lives somewhere between a mixing utility and a creative effect. Wherever our particular need falls on the spectrum between those uses, there’s one simple step we can add to the process that will shape sounds with cleaner and more musical envelopes - highpass filtering the input signal.
Split the clip towards it’s end with [cmd + e]. Cutting as close to the end as possible (within a reasonable degree) usually works well as a starting point, but don’t worry about being too precise right now — you’ll almost certainly make adjustments in the blending stage later anyway.
At this point you’ll also want to boost the gain of that second clip you've just made. I find it’s always better to push this a bit further than what your gut tells you — it’s really easy to taper back later if necessary, but the extra dynamics can add some real vitality to the track when you pull it off.
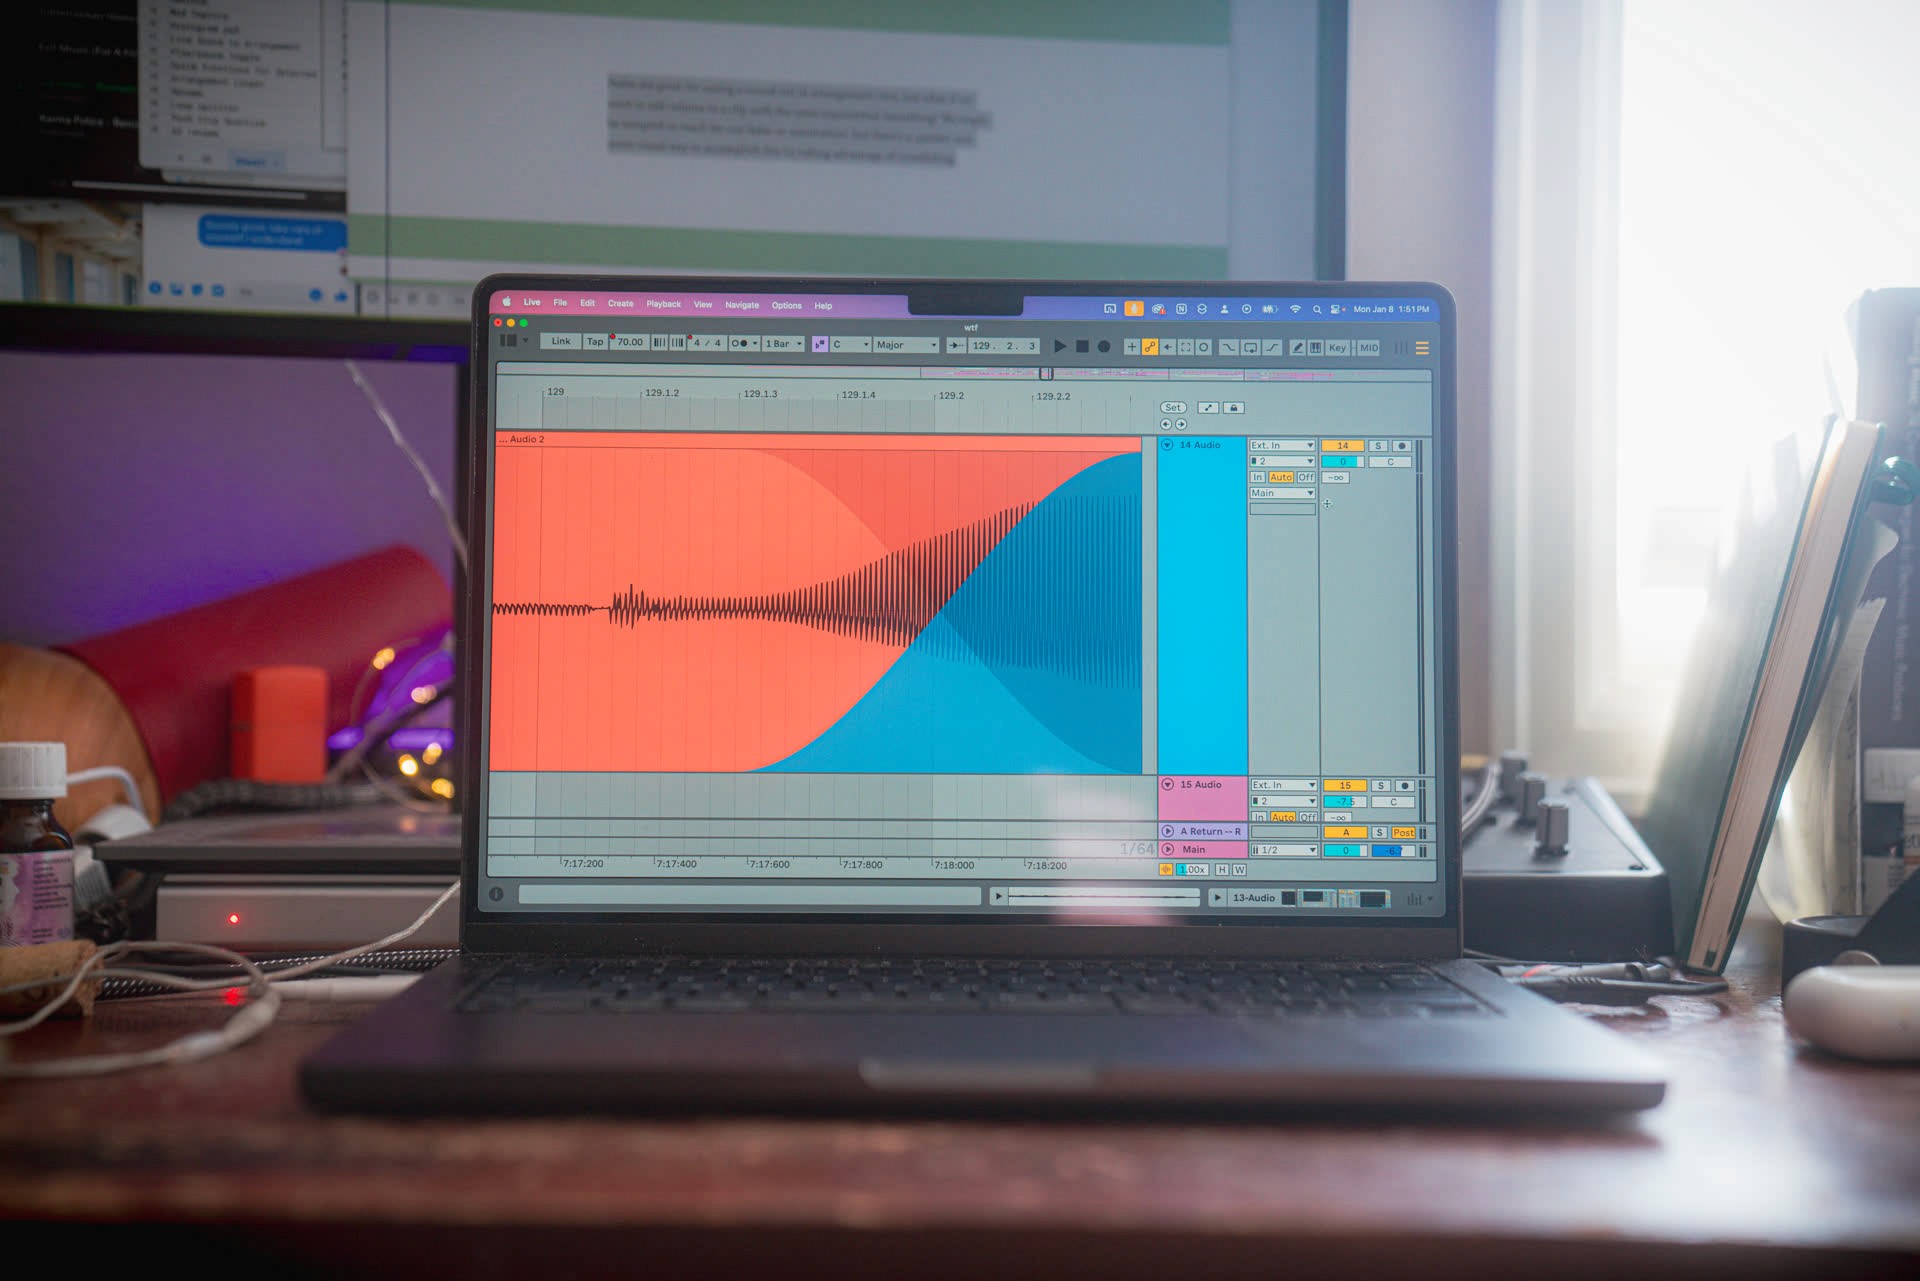
Now simply drag that louder clip's fade back over the quieter clip - the two clips will seamlessly join and create a swell in gain. There's no set rules to how far back into the clip you should go, but right now look for a nice exponential curve in the waveform.
Now simply drag that louder clip's fade back over the quieter clip - the two clips will seamlessly join and create a swell in gain. There's no set rules to how far back into the clip you should go, but right now look for a nice exponential curve in the waveform.
Now simply drag that louder clip's fade back over the quieter clip - the two clips will seamlessly join and create a swell in gain. There's no set rules to how far back into the clip you should go, but right now look for a nice exponential curve in the waveform.
To tweak this you’ll want to play it back a few times with the rest of the track and make sure the energy builds in the right spot and at the right rate. Getting this right is crucial though it's not very difficult — just adjust the crossfades and perhaps the clip gain as necessary until your sound swells perfectly. You may want to add a reverb or delay as well to build even more energy and curb the abrupt ending.
And that’s all there is to it! Try this technique with all sorts of sounds at your track’s transition points. You can work wonders by adding a little extra boost to some already dynamic content — like a reverse cymbal — or make a static droning pad contribute a build in energy just before the breakdown. Whatever the case, you should find this to be a versatile tool for making those kinds of adjustments and be able to see the results visually in the arrangement view — no need to count on hidden automation envelopes to do the work behind the scenes.
Just remember that you’re affecting the gain of that track, not its volume, so this will push all the effects it runs through harder (like compressors and saturators) . I think this is more natural (if a drummer plays louder in a buildup the compressor will clamp down more) but it is not appropriate for every scenario, so use at your discretion.
Conclusion
So that's inverted fades. Why stop at swells though? You say the attack of your crash is too much but you like the sustain as is? Don’t grab a compressor — just split the attack off from the rest of the clip, turn down the gain, and blend it back in to its original waveform for smooth, clean gain automation! I tend to split off a particularly unruly syllable from a vocal, turn down its gain, then blend it back into the surrounding clips. It’s extremely helpful to be able to see the waveform grow and shrink as you adjust the crossfades and it's quite a bit more intuitive than watching for gain reduction on a compressor when you're just trying to spot-fix volume problems.


pATCHES © 2024
pATCHES © 2024
