Playing Presets in Ableton Live
Every producer is familiar with the process of clicking through presets & effects as they look for a good starting point for the sound they're going after. Given how common this practice is, you've probably done it yourself & found that switching between sounds while a loop is playing can be quite interesting. I had one such experience the other day as I was browsing presets on an effect I had my drums running through. The changing sound worked perfectly for my track, so I worked out a system for "playing" these preset sounds precisely and rhythmically using Live's device racks & a MIDI keyboard. In this guide I'll detail how to set up your own version of this system & detail a few Ableton Live tricks along the way.
Setting Up the Rack
The first thing you need to do is to rack your device. In this case, I'll be using FabFilter's excellent Volcano plugin, but you can use any vst, native device, or a combination of effects to play with this technique. Of course, creating a rack is as easy as selecting the device & using the shortcut cmd + g. Go ahead & open the chain list as well, as we'll be using it extensively.
Now you'll want to add a second chain to the device rack. You can add any other effect from your library you choose, but for my rack the Volcano is so versatile I'm fine with duplicating it & cycling to another preset inside the plugin.
Now you'll want to add a second chain to the device rack. You can add any other effect from your library you choose, but for my rack the Volcano is so versatile I'm fine with duplicating it & cycling to another preset inside the plugin.
Now you'll want to add a second chain to the device rack. You can add any other effect from your library you choose, but for my rack the Volcano is so versatile I'm fine with duplicating it & cycling to another preset inside the plugin.
From here it's just a matter of repeating this process - the goal is to make a huge collection of interesting effects in different chains in this one device rack. I'm just going to continue to duplicate the Volcano chain & select different presets so I'll have all it's sounds at my fingertips. You can add as many as 128 effects here, but I'm going to keep it to a reasonable 15. Whatever your approach, just take note of the number of chains you've made. If you've made a lot, you can easily get a count of the chains by simply selecting them all (cmd + a works well after selecting just 1).
From here it's just a matter of repeating this process - the goal is to make a huge collection of interesting effects in different chains in this one device rack. I'm just going to continue to duplicate the Volcano chain & select different presets so I'll have all it's sounds at my fingertips. You can add as many as 128 effects here, but I'm going to keep it to a reasonable 15. Whatever your approach, just take note of the number of chains you've made. If you've made a lot, you can easily get a count of the chains by simply selecting them all (cmd + a works well after selecting just 1).
From here it's just a matter of repeating this process - the goal is to make a huge collection of interesting effects in different chains in this one device rack. I'm just going to continue to duplicate the Volcano chain & select different presets so I'll have all it's sounds at my fingertips. You can add as many as 128 effects here, but I'm going to keep it to a reasonable 15. Whatever your approach, just take note of the number of chains you've made. If you've made a lot, you can easily get a count of the chains by simply selecting them all (cmd + a works well after selecting just 1).
Selectable Chains
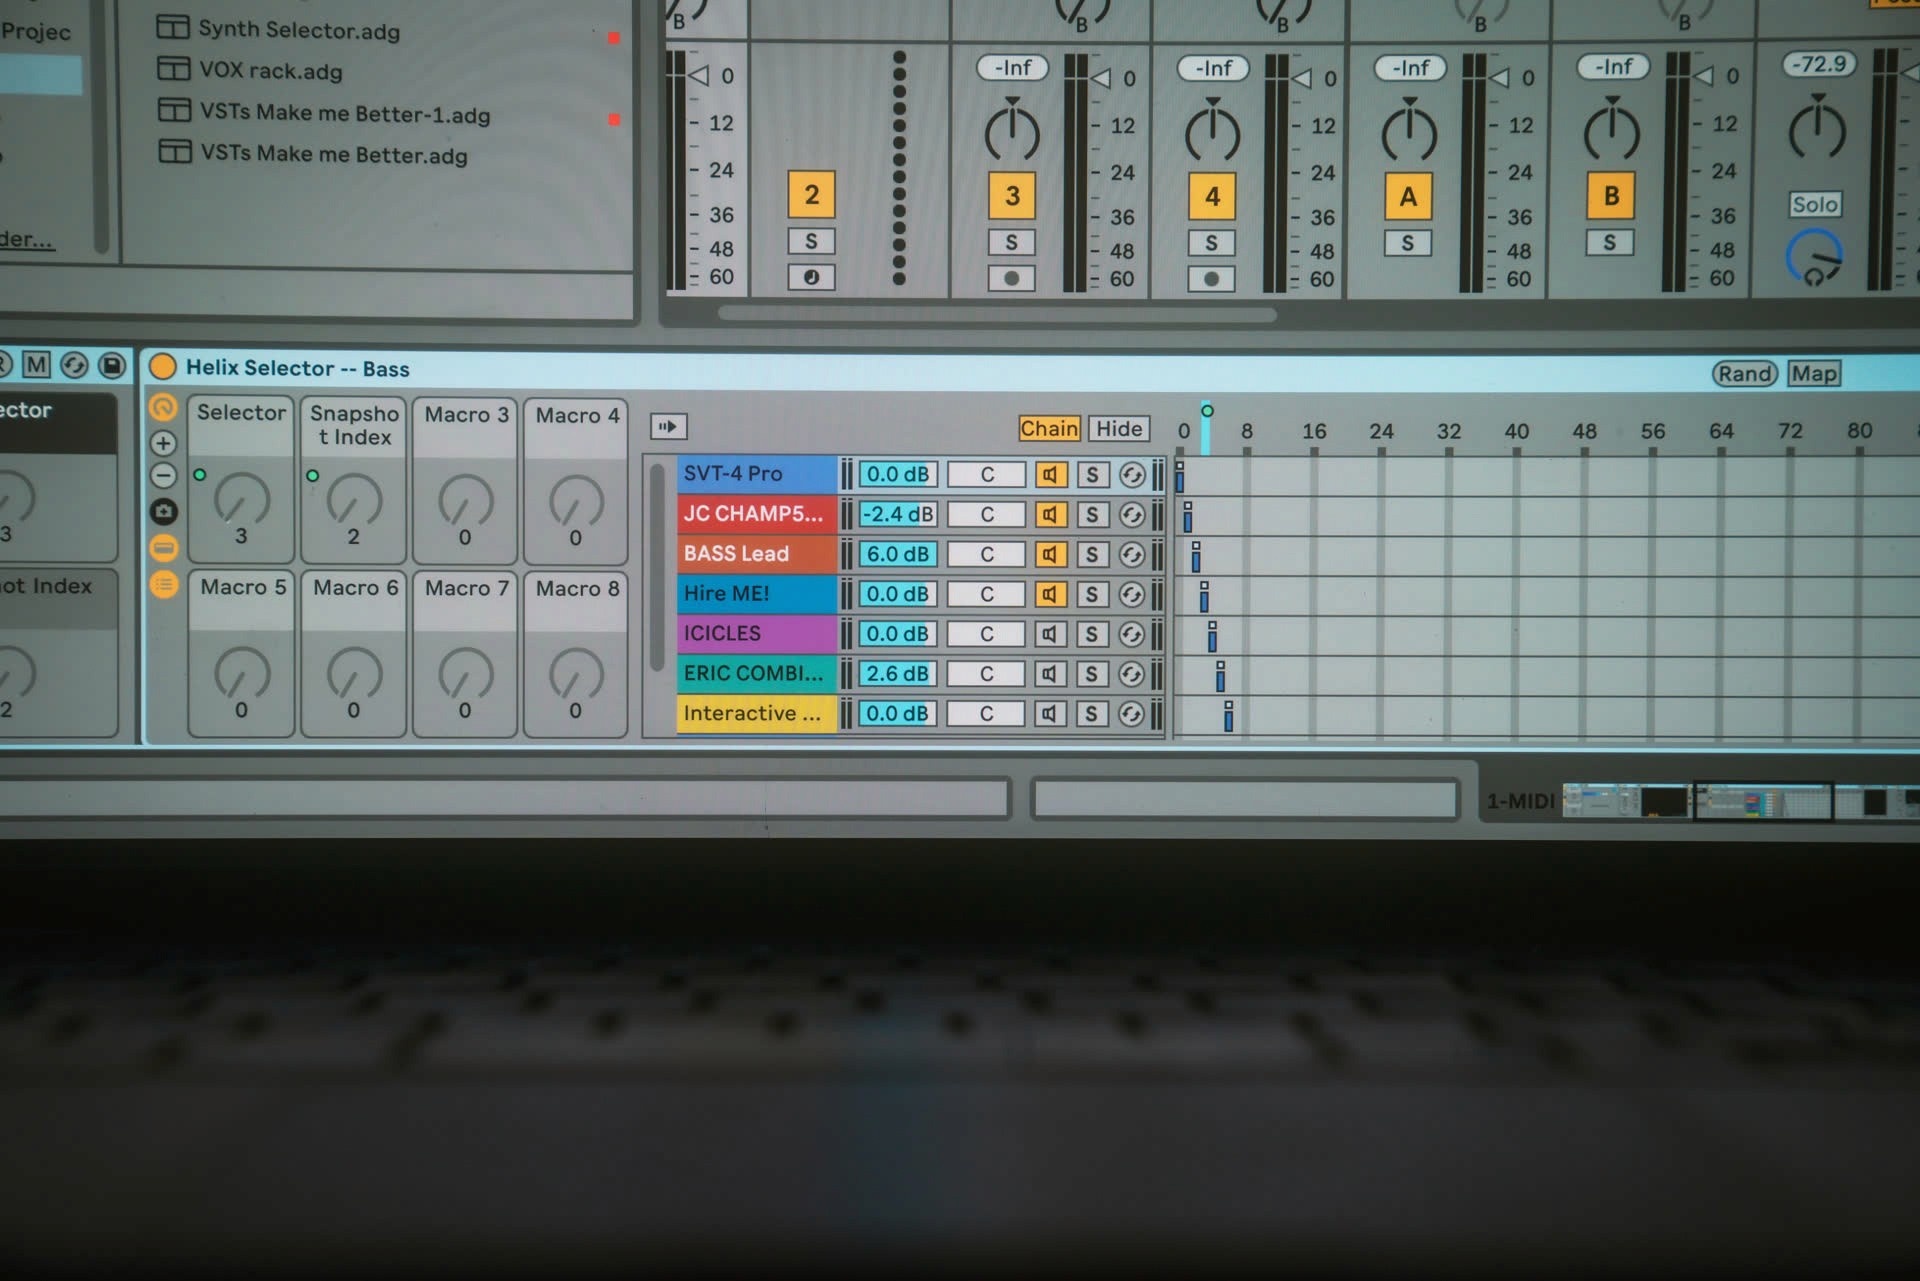
Now we'll make the chains "selectable" so we don't have a ridiculous mess of effects playing in parallel. No matter how many chains you've made, Ableton Live is set up to do make much of this process simple & automatic. Just start by opening up the chain select editor & drag the first chain's zone (the blue bar) to the number of total chains you have minus one. Why minus one? Because zero is included in the zone, the chain selector will have one more option then the value set (i.e. if you drag the zone out to 2, this will cover three options - 0, 1, & 2). In my case, since I have 15 chains, I will drag this first one out to 14.
All you need to do now is right click this first blue bar & select distribute ranges equally from the context menu. Et voila, all of the chains now have a unique zone associated with them & the track will only pass audio through them when that particular zone is selected!
Selectable Chains
Now we'll make the chains "selectable" so we don't have a ridiculous mess of effects playing in parallel. No matter how many chains you've made, Ableton Live is set up to do make much of this process simple & automatic. Just start by opening up the chain select editor & drag the first chain's zone (the blue bar) to the number of total chains you have minus one. Why minus one? Because zero is included in the zone, the chain selector will have one more option then the value set (i.e. if you drag the zone out to 2, this will cover three options - 0, 1, & 2). In my case, since I have 15 chains, I will drag this first one out to 14.
All you need to do now is right click this first blue bar & select distribute ranges equally from the context menu. Et voila, all of the chains now have a unique zone associated with them & the track will only pass audio through them when that particular zone is selected!
We want to maximize accessibility & cleanliness for an optimal workflow always, so right click the orange bar in the chain select ruler & map it to one of the group's macros. Next, open up the macro map mode & set the max value for the chain selector to the number of zones you have set up, once again using the "total number of chains minus one" rule. Again, I set mine to 14 (15-1). Now the macro knob selects between the chains!
We want to maximize accessibility & cleanliness for an optimal workflow always, so right click the orange bar in the chain select ruler & map it to one of the group's macros. Next, open up the macro map mode & set the max value for the chain selector to the number of zones you have set up, once again using the "total number of chains minus one" rule. Again, I set mine to 14 (15-1). Now the macro knob selects between the chains!
We want to maximize accessibility & cleanliness for an optimal workflow always, so right click the orange bar in the chain select ruler & map it to one of the group's macros. Next, open up the macro map mode & set the max value for the chain selector to the number of zones you have set up, once again using the "total number of chains minus one" rule. Again, I set mine to 14 (15-1). Now the macro knob selects between the chains!
Only one of these chains will be active at any given time, but some devices are processor heavy even in standby mode. If you're concerned about CPU, you may want to take an extra step to turn off the effects that aren't being used. This can be done easily enough - just map the device activator of the first chain to a new macro in the rack, then right click that same device activator & select map to all siblings from the context menu. If you don't see this option, you need to enable it using options.txt. You have to reset the max on the chain selector back to 127 (more on this later) & then open up the map mode to change each device's min to it's associated zone in the chain editor & its max to 1+ that number. The first chain should be min:0, max:1, the second should be min:1, max:2, & so on.
Only one of these chains will be active at any given time, but some devices are processor heavy even in standby mode. If you're concerned about CPU, you may want to take an extra step to turn off the effects that aren't being used. This can be done easily enough - just map the device activator of the first chain to a new macro in the rack, then right click that same device activator & select map to all siblings from the context menu. If you don't see this option, you need to enable it using options.txt. You have to reset the max on the chain selector back to 127 (more on this later) & then open up the map mode to change each device's min to it's associated zone in the chain editor & its max to 1+ that number. The first chain should be min:0, max:1, the second should be min:1, max:2, & so on.
Only one of these chains will be active at any given time, but some devices are processor heavy even in standby mode. If you're concerned about CPU, you may want to take an extra step to turn off the effects that aren't being used. This can be done easily enough - just map the device activator of the first chain to a new macro in the rack, then right click that same device activator & select map to all siblings from the context menu. If you don't see this option, you need to enable it using options.txt. You have to reset the max on the chain selector back to 127 (more on this later) & then open up the map mode to change each device's min to it's associated zone in the chain editor & its max to 1+ that number. The first chain should be min:0, max:1, the second should be min:1, max:2, & so on.
Now group the rack into a new rack & map both macros from the nested rack (the chain selector knob & the device on/off macro) to a single macro in this new rack. Finally, open map mode in the new rack to change the max on both of these to the "total number of chains minus one" number. All of those devices will now only be turned on when they are selected by the macro!
Now group the rack into a new rack & map both macros from the nested rack (the chain selector knob & the device on/off macro) to a single macro in this new rack. Finally, open map mode in the new rack to change the max on both of these to the "total number of chains minus one" number. All of those devices will now only be turned on when they are selected by the macro!
Now group the rack into a new rack & map both macros from the nested rack (the chain selector knob & the device on/off macro) to a single macro in this new rack. Finally, open map mode in the new rack to change the max on both of these to the "total number of chains minus one" number. All of those devices will now only be turned on when they are selected by the macro!
You might also find it useful to go through each preset & do a little "mixing" to keep them all cohesive. Adjusting the volume or adding some light corrective eq to each chain will help keep them cohesive as you cycle through, especially if you've chosen to use several different devices. Use your best judgement & taste to apply this as necessary.
You might also find it useful to go through each preset & do a little "mixing" to keep them all cohesive. Adjusting the volume or adding some light corrective eq to each chain will help keep them cohesive as you cycle through, especially if you've chosen to use several different devices. Use your best judgement & taste to apply this as necessary.
You might also find it useful to go through each preset & do a little "mixing" to keep them all cohesive. Adjusting the volume or adding some light corrective eq to each chain will help keep them cohesive as you cycle through, especially if you've chosen to use several different devices. Use your best judgement & taste to apply this as necessary.
Keyboard Range Mapping
This is already an awesome & convenient selector for effects, but what I want to do is to make these chains more "playable". Sure, you could midi map the macro selector to a knob on your controller & browse through the chains, but it isn't precise enough to switch quickly between particular sounds to play along rhythmically with your track. For this, I like to take advantage of keyboard range mapping. To set this up, simply midi map the macro selector as normal but hold down one note of your keyboard & then press another key further up. You'll see this range reflected in the mapping & ideally you'll have as many keys on your keyboard as chains in your rack.
With this now set up, you'll be able to select the different device chains in your rack with the different notes on your keyboard! You should now be able to "play" effects along with your track, adding interest by switching between different sounds as fills at the end of every bar or so.
You can either record the automation into your track or resample the audio to be chopped & organized later. I prefer the latter approach as there is a kind of exploratory, random nature to the process of "playing" effect presets so I like the flexibility of recording a lot of material & pulling out the most successful bits to use in my track.
Keep in mind also you can save the racks you make in this way to your library for later recall. For this, you might find it useful to create a whole lot of racks using your favorite effects that you can pull into a new project at any time. Even if the "playing" aspect isn't appropriate, these can be really convenient just as a preset selector!
Keep in mind also you can save the racks you make in this way to your library for later recall. For this, you might find it useful to create a whole lot of racks using your favorite effects that you can pull into a new project at any time. Even if the "playing" aspect isn't appropriate, these can be really convenient just as a preset selector!
Keep in mind also you can save the racks you make in this way to your library for later recall. For this, you might find it useful to create a whole lot of racks using your favorite effects that you can pull into a new project at any time. Even if the "playing" aspect isn't appropriate, these can be really convenient just as a preset selector!


pATCHES © 2024
pATCHES © 2024
