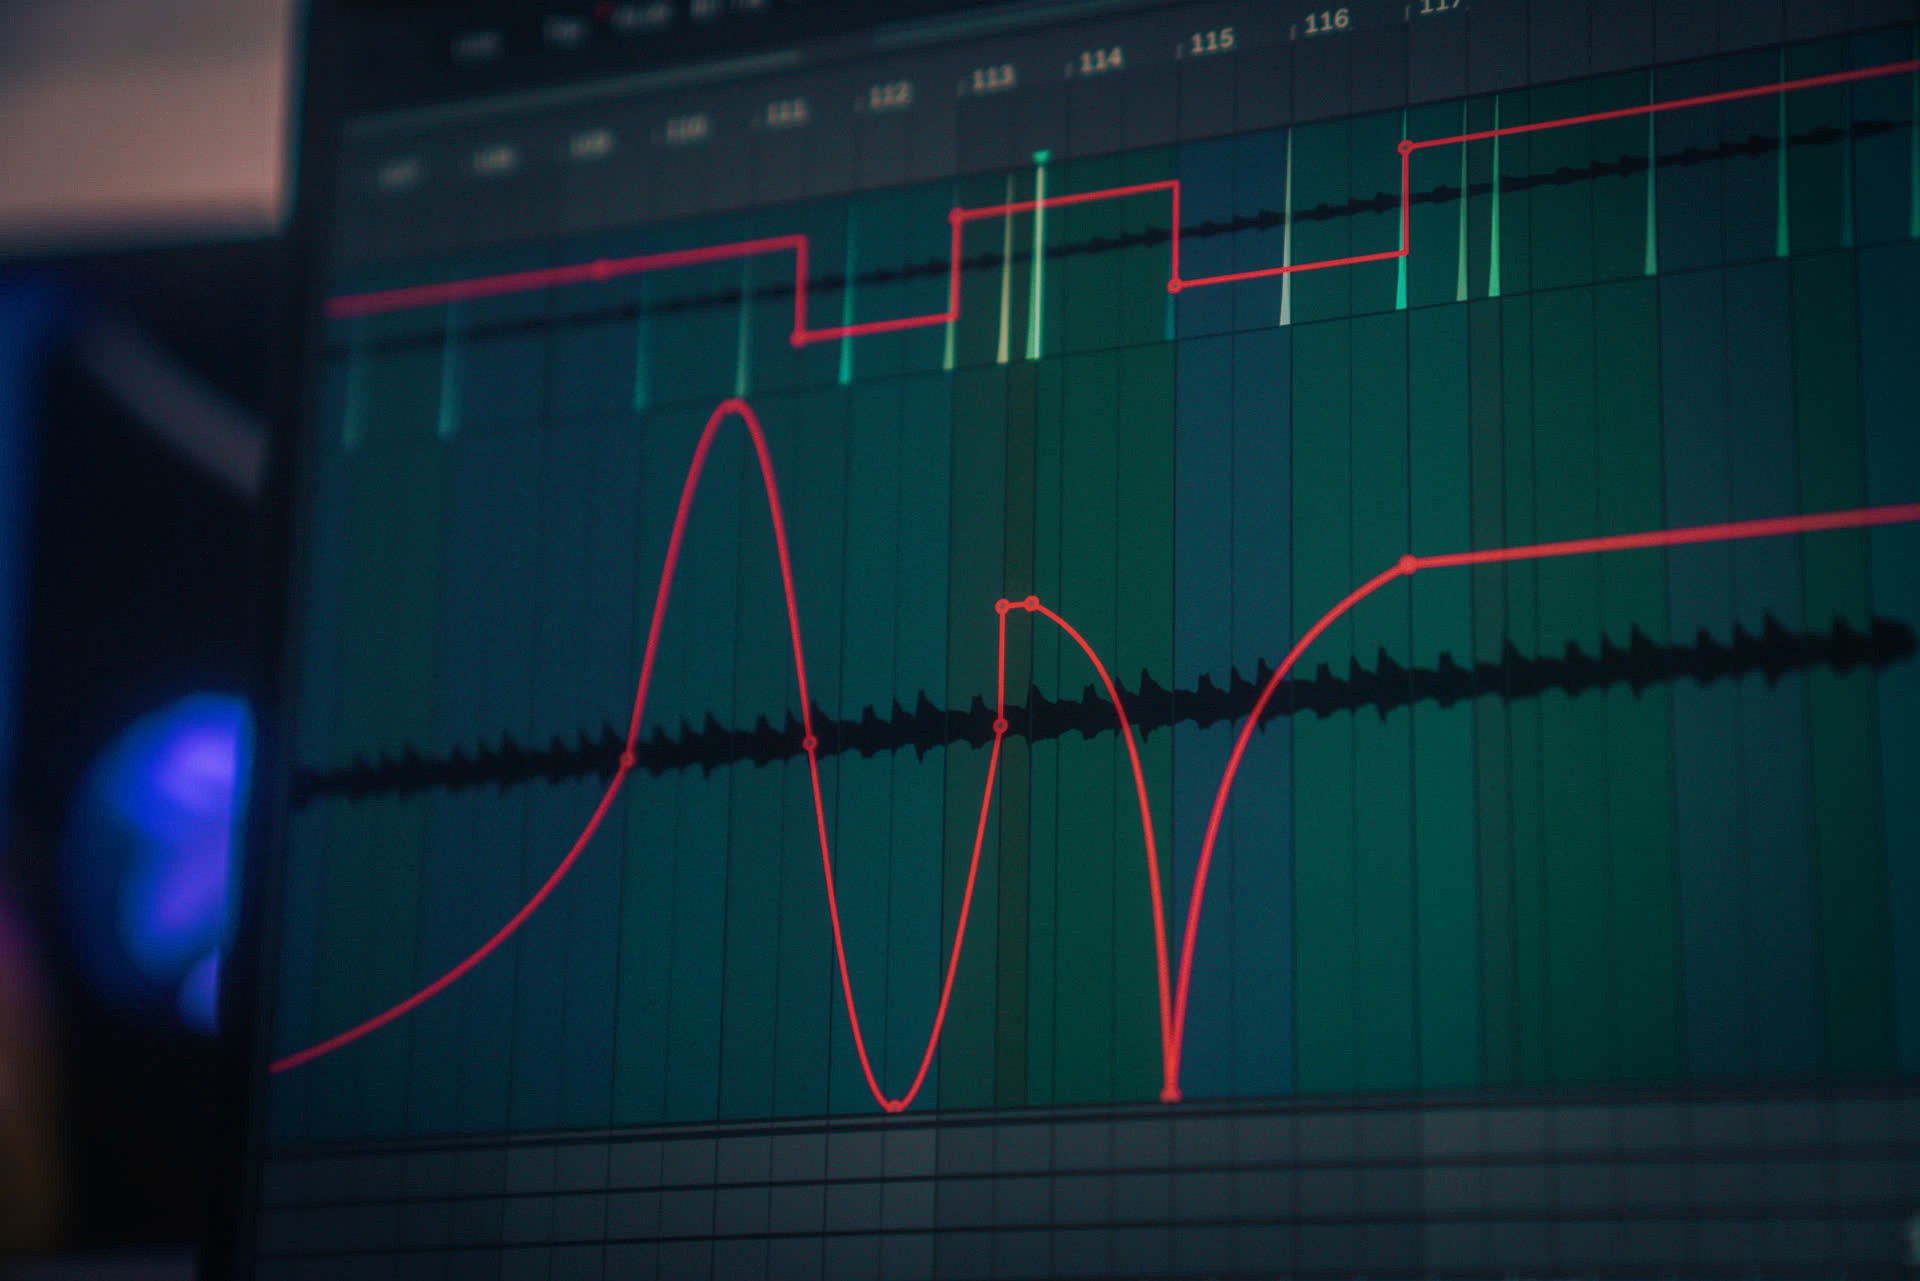
Advanced Automation in Ableton Live
compared to live instrumentation, digitally created music can sometimes be heard as stagnant & stale. one of the tools producers turn to for remedy is automation; modulating parameters in short bursts or over a long period of time keeps your tune dynamic & evolving. even simple changes can make a huge impact on the organic quality of your track, but knowing advanced techniques can help you more perfectly shape sounds to your vision. some of these are indeed rather basic in the name of being thorough, but all of these are important if you wish to have a complete understanding of your automation toolbox.
Adjustments by Selection
one time-saving tip is to increase or decrease the overall automation amount in an entire section. to do this, select the portion of the track you want to adjust. as your mouse pointer approaches the automation curve, you'll notice it will change color. this means you're ready to go - just click & drag the selection from there.
a not not-dissimilar time-saving technique using selections allows you to quickly make ramps. there's no need to create a whole mess of nodes - just select the portion you want to ramp, drag it to the highest point you want it to go, & delete the node on the side you want to be the lower side. easy! check out this article if you want to know more about making selections & their uses.
a not not-dissimilar time-saving technique using selections allows you to quickly make ramps. there's no need to create a whole mess of nodes - just select the portion you want to ramp, drag it to the highest point you want it to go, & delete the node on the side you want to be the lower side. easy! check out this article if you want to know more about making selections & their uses.
a not not-dissimilar time-saving technique using selections allows you to quickly make ramps. there's no need to create a whole mess of nodes - just select the portion you want to ramp, drag it to the highest point you want it to go, & delete the node on the side you want to be the lower side. easy! check out this article if you want to know more about making selections & their uses.
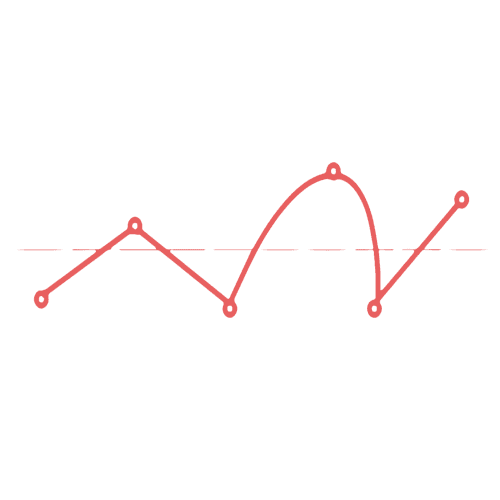
Key Modifiers & alternate Input Methods
linear rising automation is great but it's rarely sounds natural. by now you are probably duly familiar with alt/option's logarithmic curving effect on envelopes, but we can take it a step further by easily creating the famously smooth sigmoid function you're used to seeing in live's fades. just place a breakpoint in the middle of your ramp & create opposite curves on either side of it. don't worry about getting it perfect right away as you'll be able to adjust the middle node to fine tune the shape.
with recorded automation in particular, it can be frustrating to try to make changes with so many breakpoints in the automation lane. manually deleting nodes would be impossibly time-consuming...unless you know that by simply holding down shift & dragging a node you can delete all the other breakpoints it's dragged across.
with recorded automation in particular, it can be frustrating to try to make changes with so many breakpoints in the automation lane. manually deleting nodes would be impossibly time-consuming...unless you know that by simply holding down shift & dragging a node you can delete all the other breakpoints it's dragged across.
with recorded automation in particular, it can be frustrating to try to make changes with so many breakpoints in the automation lane. manually deleting nodes would be impossibly time-consuming...unless you know that by simply holding down shift & dragging a node you can delete all the other breakpoints it's dragged across.
you've probably slipped into draw mode by accident because of its simple shortcut - just press 'b' in arrangement mode while your mouse hovers over a track. it's just as easy to forget about, but it can be extremely useful when you need a very particular curve, especially when hardware mapping is not an option. don't forget the "definition" of your curve will be determined by the grid size & you can turn the grid off with cmd + 4 to be able to draw exactly as you please.
you've probably slipped into draw mode by accident because of its simple shortcut - just press 'b' in arrangement mode while your mouse hovers over a track. it's just as easy to forget about, but it can be extremely useful when you need a very particular curve, especially when hardware mapping is not an option. don't forget the "definition" of your curve will be determined by the grid size & you can turn the grid off with cmd + 4 to be able to draw exactly as you please.
you've probably slipped into draw mode by accident because of its simple shortcut - just press 'b' in arrangement mode while your mouse hovers over a track. it's just as easy to forget about, but it can be extremely useful when you need a very particular curve, especially when hardware mapping is not an option. don't forget the "definition" of your curve will be determined by the grid size & you can turn the grid off with cmd + 4 to be able to draw exactly as you please.
Automation in the Clipboard
you'll often want to move & edit automation across your track, though the default copy/paste functions links audio & envelopes together. fortunately, automation can be separately placed on the clipboard - just right click or hold down the option/alt key while using standard clipboard shortcuts.
on the other hand, sometimes you'll want to move audio around without attaching the overlayed envelope. look for the small ignored lock button in the upper-right corner of your screen, however, & enable it to lock envelopes & move audio independently from your automation.
on the other hand, sometimes you'll want to move audio around without attaching the overlayed envelope. look for the small ignored lock button in the upper-right corner of your screen, however, & enable it to lock envelopes & move audio independently from your automation.
on the other hand, sometimes you'll want to move audio around without attaching the overlayed envelope. look for the small ignored lock button in the upper-right corner of your screen, however, & enable it to lock envelopes & move audio independently from your automation.
Setting Up for Recording
there are two important settings concerning automation recording you should be aware of. the first you'll find in the record/warp/launch tab of the settings window. by default, "record session automation in" will be set to "armed tracks." I prefer this to be set to "all tracks" as you generally won't be recording & fiddling with parameters unless you want that fiddling committed to tape. with "all tracks" you don't have to worry about overwriting midi or audio by arming the track just to record in a filter sweep. the other setting to be aware of is the automation arm button at the top of the screen. it's simple enough to understand - with this on, automation will record; with it off, no automation will record I almost always turn this off while I am tracking an artist so that I'm free to adjust eq's & other settings without writing nonsense into the automation lane.
Limiting Automation Range
often times the parameter adjustments you want to make fall in a particular range, leaving you to squint & make extremely incremental movements with the mouse. to make it easier on yourself, you can limit the range of the automation lane to just the useable range using this trick: create a group (cmd + g) out of the device, map the parameter you want to automate to a macro, then open up map mode. you'll be able to specify a high & low for this parameter & the automation lane in arrangement view will reflect this range.
Adding All Automation Lanes
many automated parameters interact with one another & are useful to view together. you can add extra automation lanes with the small "+" below the automation section on a track, but right clicking one of these extra automation will give you the option to "add lane for each automated envelope" which will quickly fill up your window with all the parameters you've been making changes to. imagine modulating the frequency & resonance of a filter & being able to view their respective envelopes together!
that's it! if you learned something from this article, let me know on twitter. if you liked this article, you might also enjoy my guide on warping or key mapping - check out the links to those below:
that's it! if you learned something from this article, let me know on twitter. if you liked this article, you might also enjoy my guide on warping or key mapping - check out the links to those below:
that's it! if you learned something from this article, let me know on twitter. if you liked this article, you might also enjoy my guide on warping or key mapping - check out the links to those below:


pATCHES © 2024
pATCHES © 2024
